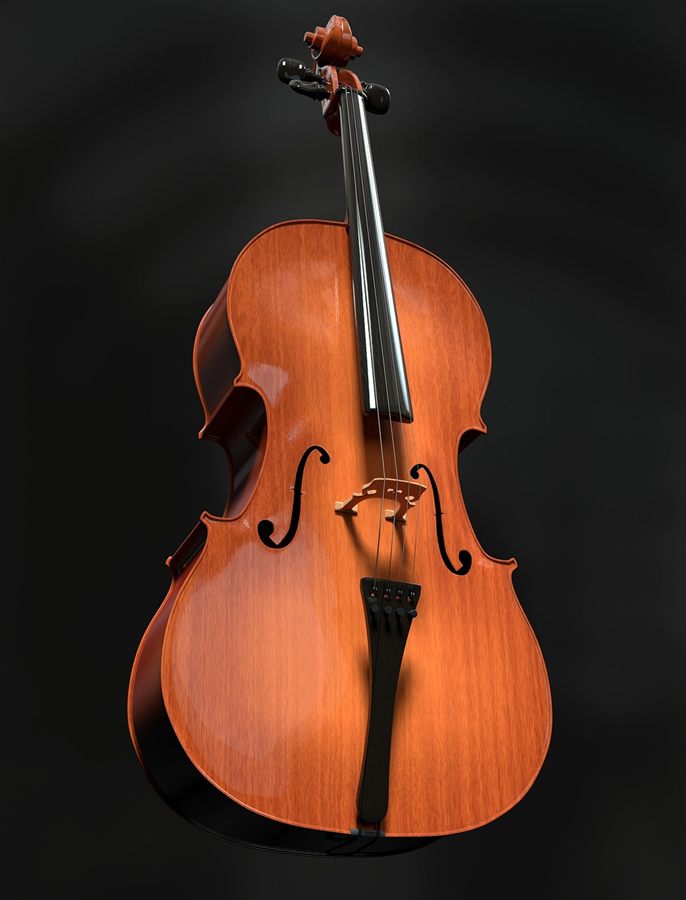
Short answer: The endpin, bridge and sound post decide how a cello sits, responds and stays stable. You set and maintain the endpin yourself, you watch the bridge's lean by eye, and a violin-shop luthier handles the sound post and the fit of the bridge. Faults here are usually not a reason to walk away from a used cello, but they are a fair reason to negotiate on price.
Why these three parts belong together
The bridge carries string vibration into the top, the sound post braces the top from inside and passes vibration on to the back, and the endpin connects the instrument to the floor and to your body. None of the three is glued. They stay in place through string tension, fit and friction. That is why they shift with climate, transport and string changes, and why they are the first places to read how well a used cello has been looked after. A leaning bridge or a fallen sound post does not make a bad cello, but a cello where all three sit cleanly usually has a careful owner.
The endpin
Types and materials
The endpin became standard on the cello in the middle of the 19th century. It is made of metal (mostly steel, also titanium and brass or tungsten combinations), of carbon fiber, or occasionally of wood. Common rod diameters run from about 8 to 10 mm, and a typical length is around 520 mm. Besides the straight pin there are angled designs (often called Tortelier style) that tilt the cello slightly toward the player, and extensions for very tall players.
Steel pins are sturdy, heavier and cheap. Carbon rods are lighter. Whether the weight of the pin audibly changes the sound is judged differently: some shops report freer vibration with light carbon, others prefer the mass of metal for carrying power and projection. An expensive endpin is not a guarantee of better tone. If you compare pins, change one thing at a time, keep the extended length the same and play the same passage back to back.
Prices for pins vary widely by shop and material, so ask the shop for a quote. Replacing an endpin in a repair shop starts at around $50 for labor (parts extra, Oct. 2026).
Setting the length
The endpin matters more for posture than many beginners expect. As a rule of thumb:
- Sit upright on the front half of a chair with your feet flat on the floor.
- The upper bout of the cello rests against your sternum, the lower bout touches your thighs.
- The C peg should sit about level with your left ear.
- A few inches of space remain between the neck and your collarbone so the left arm stays free.
With a pin that is too long, the cello pushes you against the back of the chair and restricts the left arm. With a pin that is too short you slump and the back rounds. Body height alone does not set the length; what matters is what feels comfortable for posture and technique. For which cello size fits you in the first place, see Cello sizes for kids and adults.
Endpin holder and set screw
The pin runs through a guide in the end block and is locked with a set screw. If it creeps in during playing, snug the screw hand-tight and with feel. Do not overtighten: metal rods can get grooved, and carbon rods are more sensitive to point pressure. If the pin will not stay put even with the screw tightened, the guide is usually worn or the rod diameter does not match the bushing. New guides, converting from 8 to 10 mm, or a seized, warped holder are work on the instrument itself and belong in a shop (varies by shop, get a quote).
A bent endpin comes from falls or from someone stepping on it. It often slides badly and tips the cello to one side. A replacement is inexpensive as long as only the rod is affected.
Floor protection and slip resistance
The tip decides whether your cello stands securely and whether you damage the floor.
- Rubber tip: the simplest solution. It protects the floor but grips only moderately on smooth or slightly sloped surfaces and wears down.
- Bare metal spike: digs into carpet and soft flooring and grips very well there. On hardwood, tile or stage floors it leaves marks and can damage them permanently. Many rehearsal rooms and halls do not allow it.
- Screw-on stoppers on the pin: they are attached to the endpin and cannot be forgotten. They do not hold on every surface, and the rubber wears out.
- Free-standing rock stops: small non-slip pads the spike sits in. They fit in any bag and hold the cello much better than a plain rubber tip. Very sharp spikes can shred soft materials over time, and the pad should be clean before reuse.
- Chair-attached anchors: an adjustable strap loops around a chair leg and holds a cup for the spike. The chair keeps the cello in place if the floor is slick. They need a chair with a suitable leg.
- Improvised options: a non-slip mat or a strip of carpet under the spike, a belt around the chair leg. Good enough in an emergency.
It helps to carry two different solutions, for example a rock stop and a strap. Holes in floors are a sore point in many venues, so an anchor is often the more polite choice than a bare spike. Accessory prices vary by shop, so check current listings.
The bridge
What a correctly standing bridge looks like
A cello bridge is held only by the strings. It is not glued, it stands on the top. That makes it vulnerable: as strings are tightened, it gets pulled toward the fingerboard and starts to tilt. A bridge sits correctly when:
- its back (the side facing the tailpiece) stands at a right angle to the top, or at most leans very slightly toward the tailpiece,
- the feet sit on an imaginary line between the inner notches of the f-holes, with equal distance to the f-hole on both sides,
- the strings are centered over the fingerboard. Sight down the fingerboard from the scroll: the end of the fingerboard should sit evenly between the sides of the bridge,
- both feet sit flush against the top without any gap when you look at them from the side.
The cello bridge is asymmetrical; the C side is taller and heavier. You will notice immediately on a used cello if a bridge has been installed the wrong way around.
What you check yourself
Look at the bridge from the side at least once a month and after every tuning session and string change. If it leans toward the fingerboard, string height changes and in the worst case the upper positions buzz. If it stays crooked for long, the wood warps, usually bowing in the middle, and the feet no longer match the top. A badly warped bridge can snap, and the string tension can damage the top. Change strings one at a time, never all at once: if tension drops completely, the sound post can fall. String grooves in the bridge should be no deeper than about half the string's thickness and can be kept smooth with a soft pencil (graphite). Which strings to choose is covered in Cello strings compared.
A leaning, warped or fallen bridge belongs in the shop: it is straightened or replaced there without risk to the top or sound post, and for a luthier straightening is often a matter of minutes. If you try it yourself anyway, go in small steps and stop at resistance.
What the shop does
A new bridge is cut from a blank and fitted by hand to the top and to the desired string height. Foot curvature, height, string spacing and curve radius are set one at a time. That takes hours, hence the price. Skimping on the fit costs in tone and durability: even small gaps between foot and top hurt sound and stability. Cheap blanks with coarse grain warp sooner. Good bridges last decades with sensible care.
Costs in the US (Oct. 2026, rough range): a bridge replacement is quoted anywhere from about $100 to $600, depending on the instrument, the blank and the luthier. At a store repair shop, labor for a replacement runs about $50 to $100 plus $24 to $220 for the bridge itself, and refitting or fixing a warp about $35. Get a quote for your cello.
The sound post
Job and position
The sound post is a small spruce dowel inside the body. It is wedged between top and back, slightly behind the treble-side bridge foot, and the luthier sets it through the f-hole with special tools. Its position and tension shape response, volume and the balance between strings. A fraction of a millimeter changes the sound.
How you recognize a problem
- The post has fallen: you often hear a rattle inside the body, and the tone gets much weaker and duller.
- It is loose or misplaced: response gets sluggish, the strings sound uneven, single notes buzz or the volume collapses.
- With a flashlight through the right f-hole you can see whether a round wooden post is standing. Whether it is in the right place, you cannot judge without experience.
Typical causes are drops or knocks, taking all strings off at once and big swings in humidity. Climate care therefore helps here too, see Humidity, cracks and winter care for the cello.
Why not do it yourself
Setting the post yourself risks pressure marks or cracks in the top, which can cut a cello's value considerably. The job is demanding because the post must be fitted precisely. If a post has fallen, loosen the strings slightly, make sure the bridge does not fall, and get to a shop soon. Do not keep playing, so the top and bridge do not take damage.
Costs in the US (Oct. 2026, rough range): at a store repair shop, resetting an existing post runs about $5 to $15 and a replacement about $65 (parts extra). Specialist shops usually charge more. Get a quote for your cello.
Buzzes and wolf tones
Not every ugly sound is a sound post problem. Buzzes often come from loose parts: fine tuners, the tailpiece, opened seams or loose string windings. Go through these with light pressure before you book a shop visit. Also check the bridge before blaming the sound post: if it stands upright and centered, the setup is basically fine.
A wolf tone is something else: a howling, stuttering throb on certain notes, usually around F-sharp on the D string or in fourth position on the G string. It arises when the vibration of the body and that of the string disturb each other. Every well-proportioned cello has at least one, and on especially resonant instruments it is often more pronounced. A wolf tone is therefore not a defect. You can tame it:
- with a wolf eliminator, a small weight or rubber on the string between bridge and tailpiece. Its effect changes with position and weight, so you try it by nudging it slightly,
- in your playing, by lightly touching another string with an extra finger at the wolf pitch or its octave,
- through the shop, which can change the sound post position or the bridge. Good setup sometimes even makes the wolf more noticeable.
Checking on a used cello
- Endpin: extends and retracts smoothly, holds at every length, sits straight, a tip is present. A loose set screw or a missing rubber tip is cheap to fix.
- Bridge: at a right angle to the top, centered between the notches, feet without gaps, wood not bowed, string grooves not too deep.
- Sound post: shine a light through the f-hole to see whether one is standing. Do all strings sound balanced? Does anything rattle when you tilt the cello gently?
- Check seams and cracks in the top around the bridge feet. More checks, deal-breakers and negotiating points are in Buying a used cello.
For a used cello without a service history, budget for a setup at a shop. Very cheap instruments often come with neglected bridge and sound post, and the shop's extra cost is part of the real price.
Common mistakes
- Taking all strings off at once, which can drop the sound post or the bridge.
- Leaving a leaning bridge "as is" until it has warped.
- Setting the endpin too long or too short and cramping posture and the left arm.
- A bare metal spike on hardwood or stage floors.
- Forcing the set screw instead of having the guide checked.
- Setting the sound post yourself or standing up the bridge without experience.
- Blaming every buzz on the sound post instead of checking loose small parts first.
- Treating a wolf tone as a defect and selling a good cello because of it.
Costs at a glance
| Item | Rough range US (Oct. 2026) |
|---|---|
| Endpin replacement (labor) | from about $50, parts extra |
| Sound post reset | about $5 to $15 at a store repair shop |
| New sound post | about $65 at a store repair shop, parts extra |
| Bridge refit or warp fix | about $35 at a store repair shop |
| Bridge replacement (labor) | about $50 to $100, bridge about $24 to $220 |
| Bridge replacement, overall range | about $100 to $600 |
| Endpin accessories and floor protection | varies by shop, get a quote |
All prices are rough ranges and depend on the shop, the instrument and the work involved. Specialist shops tend to charge more than store repair counters. Ask for a quote before you authorize any work.